GEL ELECTROPHORESIS
Gel Electrophoresis is a way to sort and measure the DNA strands. Scientists use gel electrophoresis whenever they need to sort DNA strands according to lengths. This technique is also useful for separating other types of molecules, like proteins.
The "gel" is the filter that sorts the DNA strands. It is like a sponge made of gel with many holes in it.
The "gel" is the filter that sorts the DNA strands. It is like a sponge made of gel with many holes in it.

The DNA samples are placed into holes at one end of the gel.

Electrophoresis is how we push the DNA strands through the gel filter. By adding an electrical current, we can make the DNA move.
Short strands move through the holes in the gel more quickly than long strands. Overtime, the shorter strands in the sample will move farther away from the starting point than the longer strands. DNA strands of the same length will move at the same speed and end up grouped together. In this way, the DNA strands in the sample sort themselves.

Staining the sorted groups of DNA makes them visible to naked eye. Although we cannot see the single DNA strand, we can see large groups of stained DNA strands. These groups show up as bands in the gel.

These are 5 steps to "run a gel":
1. Make the gel.
2. Set up the gel apparatus.
3. Load the DNA sample into the gel.
4. Hook up the electrical current and run the gel.
5. Stain the gel and analyse the results.
STEP 1: Make the gel
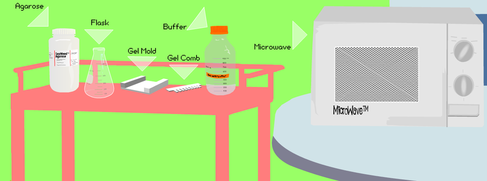
Materials: Powdered agarose, buffer, a flask, a microwave, the gel mold and the gel comb.
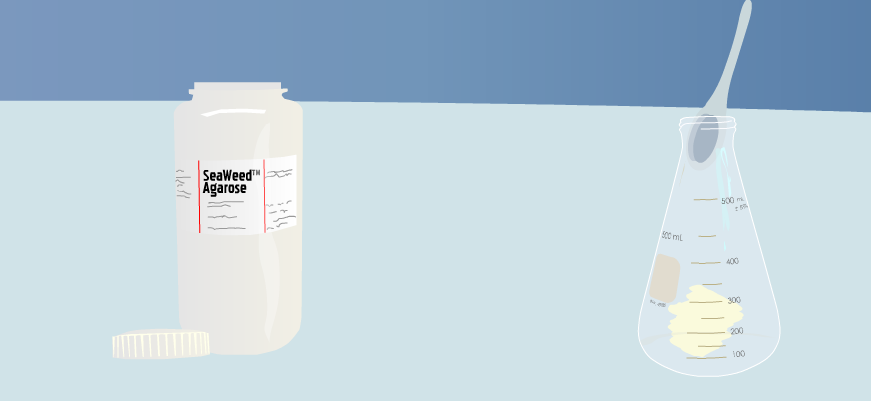
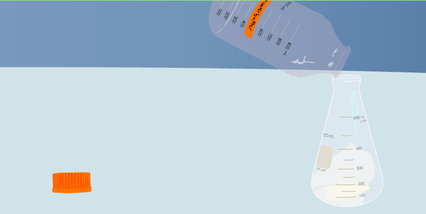
Put a small amount of agarose into the flask. Agarose is the dried powder similar to gelatin but made from seaweed. Add some liquid buffer to the flask. The buffer is the salt water solution that will let electrical charges flow through the gel.
|
|
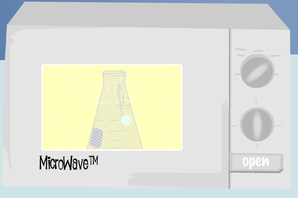
Plastic wrap is loosely placed over the top of the flask to prevent the liquid from boiling over. Open the microwave and place the flask containing the buffer and agarose mixture inside the microwave. Heat the mixture until the agarose melts into the buffer.
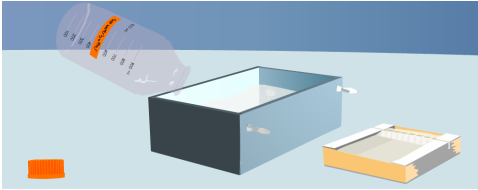
Once removed the plastic wrap from the top of the flask, pour the melted agarose mixture into the mold (the mold has tape on end to hold in the melted agarose).

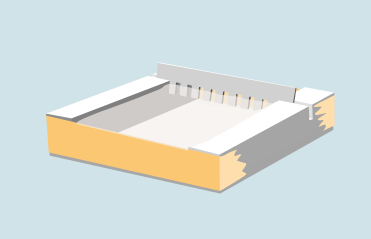
Place the comb into the gel on one end. The notches in the gel mold hold it in place. Let the gel cool and solidify. This usually takes about half an hour. As the gel cools, tiny holes will form in it. Carefully remove the comb, leaving empty wells for the DNA samples.
|

|
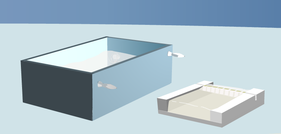
STEP 2: Set up the gel apparatus
Set up the electrophoresis box : Material (the gel, an electrophoresis box and another bottle of buffer). Pour the buffer into the electrophoresis box.
Place the gel, still in the mold, into the electrophoresis box. Once removed the tapes from the ends of the gel mold. the gel should be just barely submerged in the buffer. The buffer conducts the electrical current from one end of the gel to the other. It will also keep the gel from drying out during the experiment.
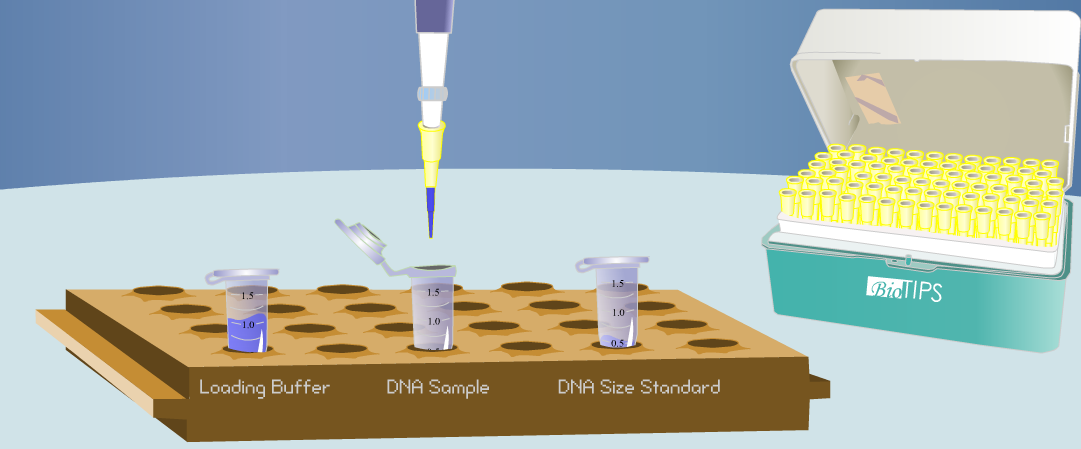
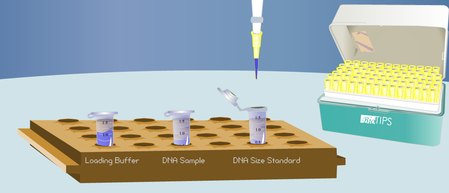
STEP 3: Load the DNA sample into the gel
Material (loading buffer, the tube of DNA, the DNA size standard, a micropipettor, the electrophoresis box containing buffer and the gel, pipette tips).
With a clean pipette tip, use the micropipettor to suck up some loading buffer, then add it to the DNA sample. DNA samples are prepared in a clear liquid solution that would be hard to see if you tried to load it directly into a well. The loading buffer contains a dye that makes the sample easy to see. It is alos slightly goopy. This makes the DNA sample thicker, so that it will drop into the well instead of floating away. The DNA size standard already contains loading buffer.
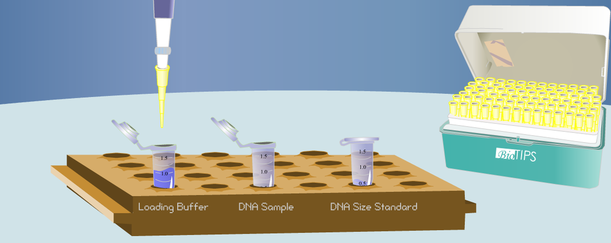
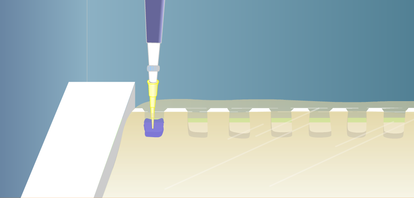
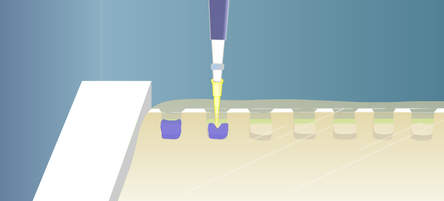
Next, use the micropipettor to transfer the DNA sample from the tube into the well of the gel. First, suck up some of the DNA sample into the pipet tip. Eject the DNA sample from the pipet into the first well of the gel. Using a clean pipet tip, use the micropippetor to suck up some DNA size standard. Transfer the DNA size standard into the next empty well. The DNA size standard contains DNA strands of known lengths. Running it on the gel will give you a reference by which to estimate the lengths of DNA strands in your sample.
|
|
STEP 4: Hook up the electrical current and run the gel.
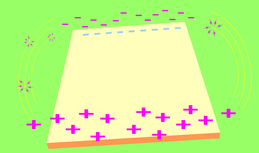
When you turn on the power, the black end will generate a negative charge. The red end will generate a positive charge. Together, they will pass the current through the gel. DNA has a negative charge. To move DNA through the gel, you must put the black cord - the negative charge - closest to the wells.
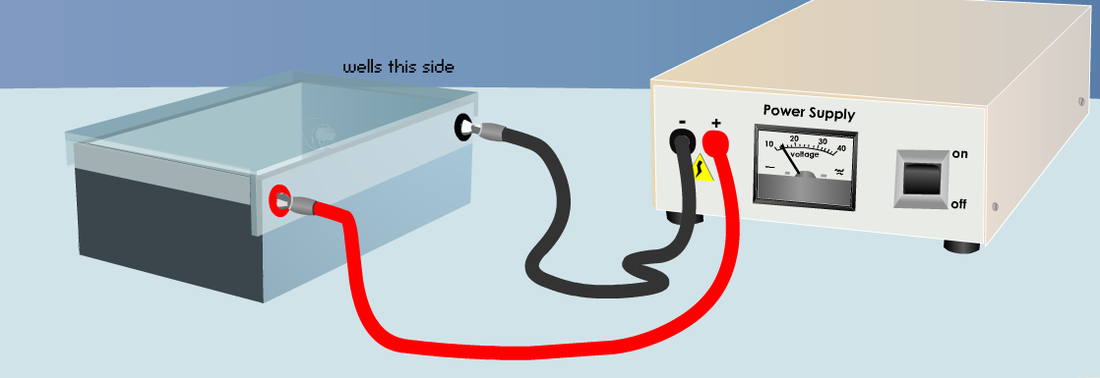
The gel is off and running. There are tiny air bubbles coming out of the electrodes at both ends of the electrophoresis box. These bubbles have proved that a current is running.

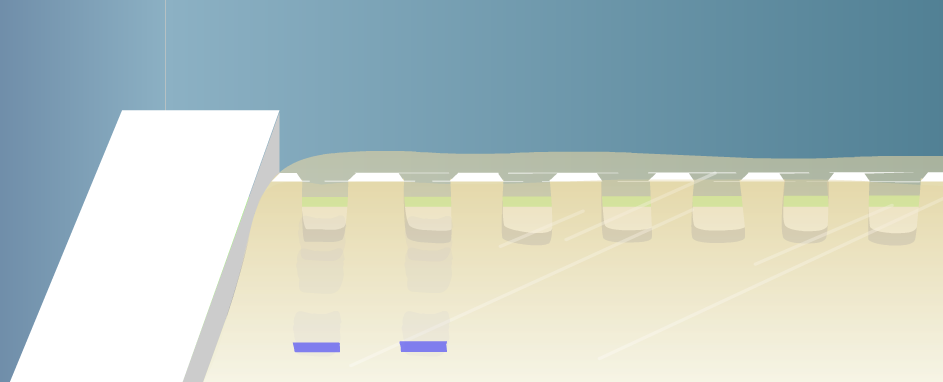
Repelled by the negative charge, the DNA moves through the gel toward the positive charge at the other end. Short DNA strands move through the holes in the gel more quickly than long strands, we cannot actually see the migrating DNA bands (grey), but we can see the blue dye from the loading buffer as it migrates.
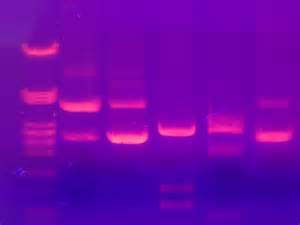
STEP 5: Stain the gel and analyse the results.
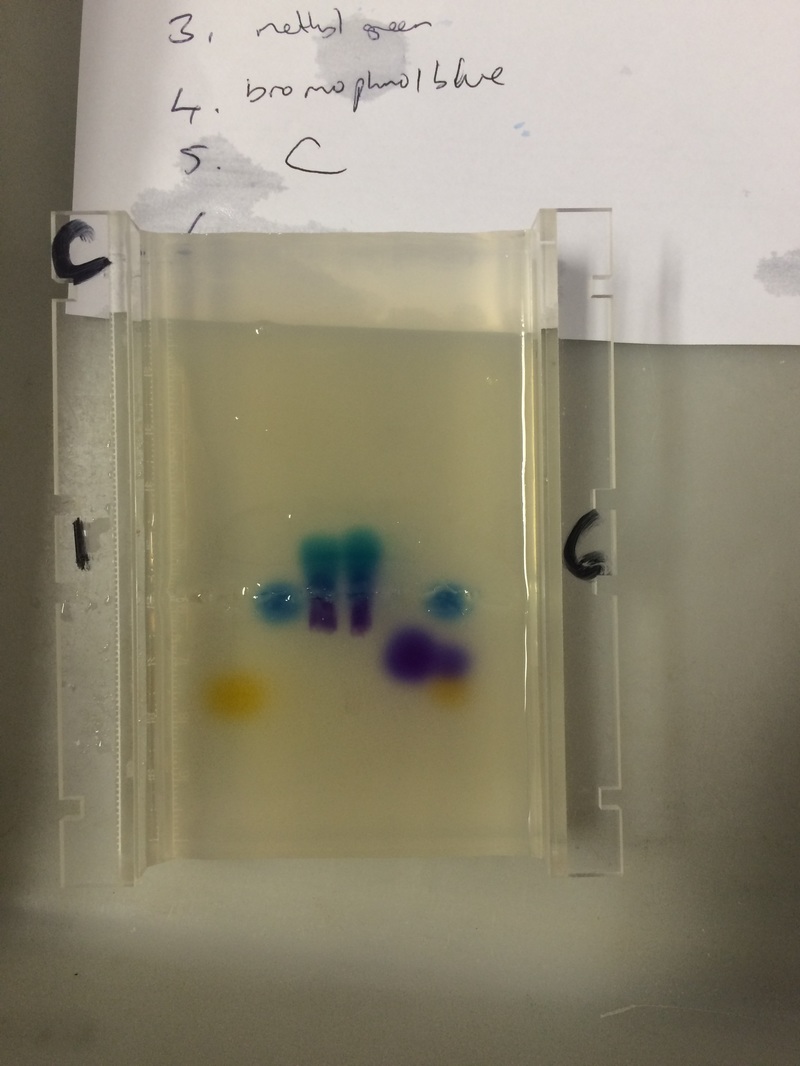
The gel mold with the gel in it is taken out of the electrophoresis box. First, the DNA in the gel need to be stained using DNA staining solution. The stain is a chemical called ethidium bromide, which binds to DNA and shows up under fluorescent light. Although, we cannot see single DNA strands, we can see large groups of stained DNA strands. These groups will show up as bands in the gel.
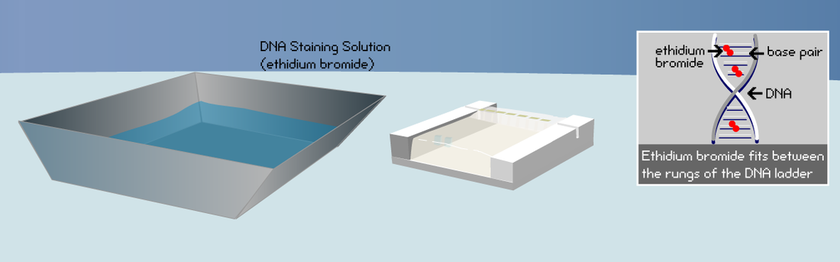
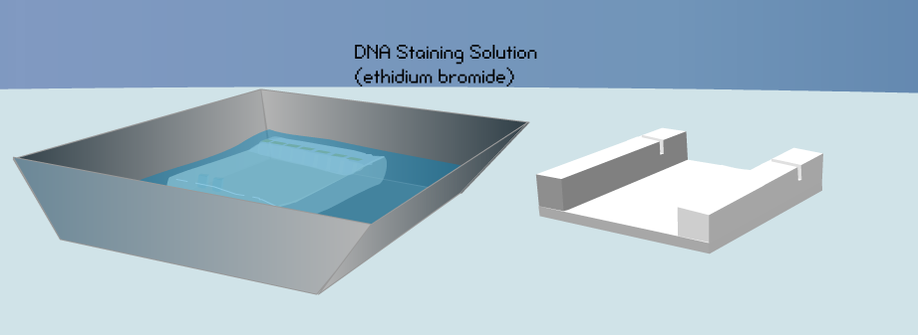
Drag the gel out of the mold and put it into the DNA staining solution. It takes about half an hour to stain the DNA in the gel.
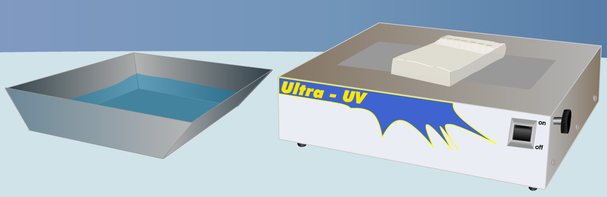
Remove the gel from the staining solution and place it on the UV (ultraviolet) light box.
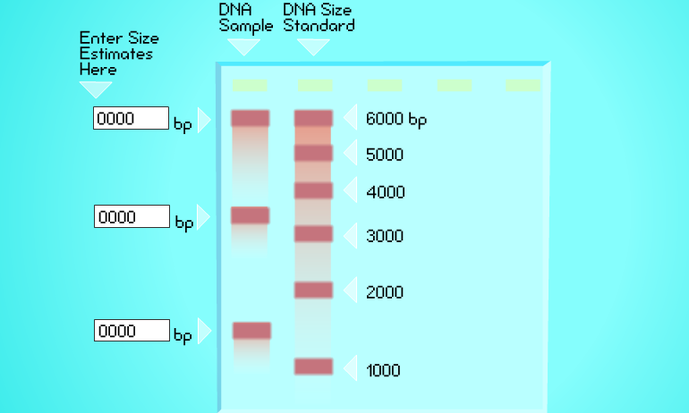
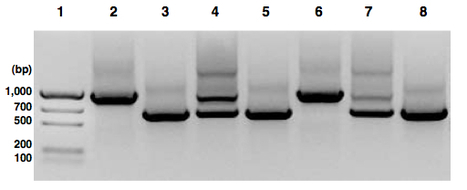
Now, the approximate lengths of the DNA strands can be determined. Compare the bands from DNA sample with the bands of known length from the DNA size standard.
Gel Electrophoresis results in real life:
|
|